The latest Game Update 2.6: Galactic Starfighter comes with a brand-new SWTOR Kuat Drive Yards Flashpoint. Players level 15-55 can join Kuat Drive Yards. Stats are automatically boosted upon entering. Players level 55 can join flashpoint manually throw entrance at main fleet, while players level bracket 15-54 need to use LFG system tool. This flashpoint consists out of three randomized combat scenarios. Upon completing the first zone scenario, you’ll unlock the second random one. The third zone has only one random boss.
Kuat Drive Yards is available in the new Tactical – Role Neutral Flashpoint category in Group Finder. You can find Kuat Drive Yards Lore at SWTOR official page.
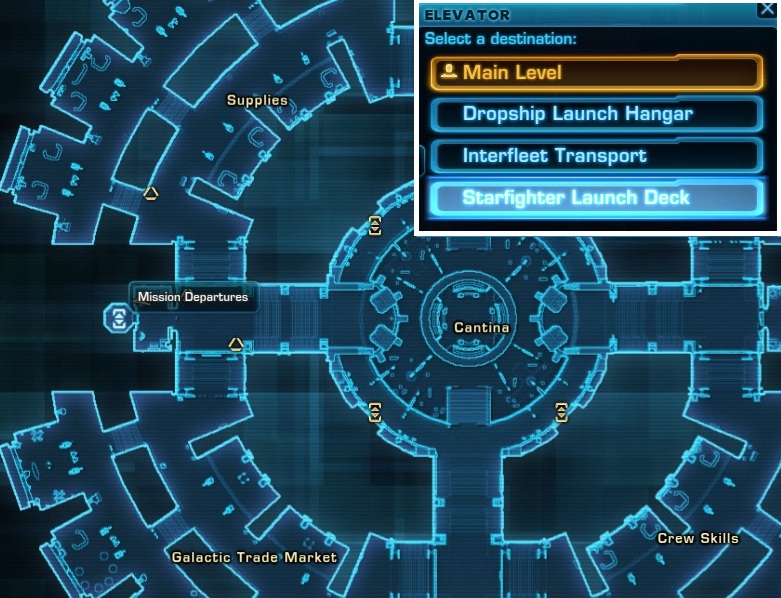
Entrance
In order to enter Kuat Drive Yards as level 55, proceed toward the Mission Departures Elevator in Main Fleet. Choose Starfighter floor. Before proceeding toward the flashpoint, be sure to grab the main quest REP “The Secret War“, EMP “The Ranken Initiative” that rewards: Credits, Purple Reputation Trophy (large amount of reputation points), Planetary Commendations, Primeval Artifact Storage Case( Class 10 Lockbox, can contain item modifications, ) at the same floor. All players level 15-55 can grab this quest.-

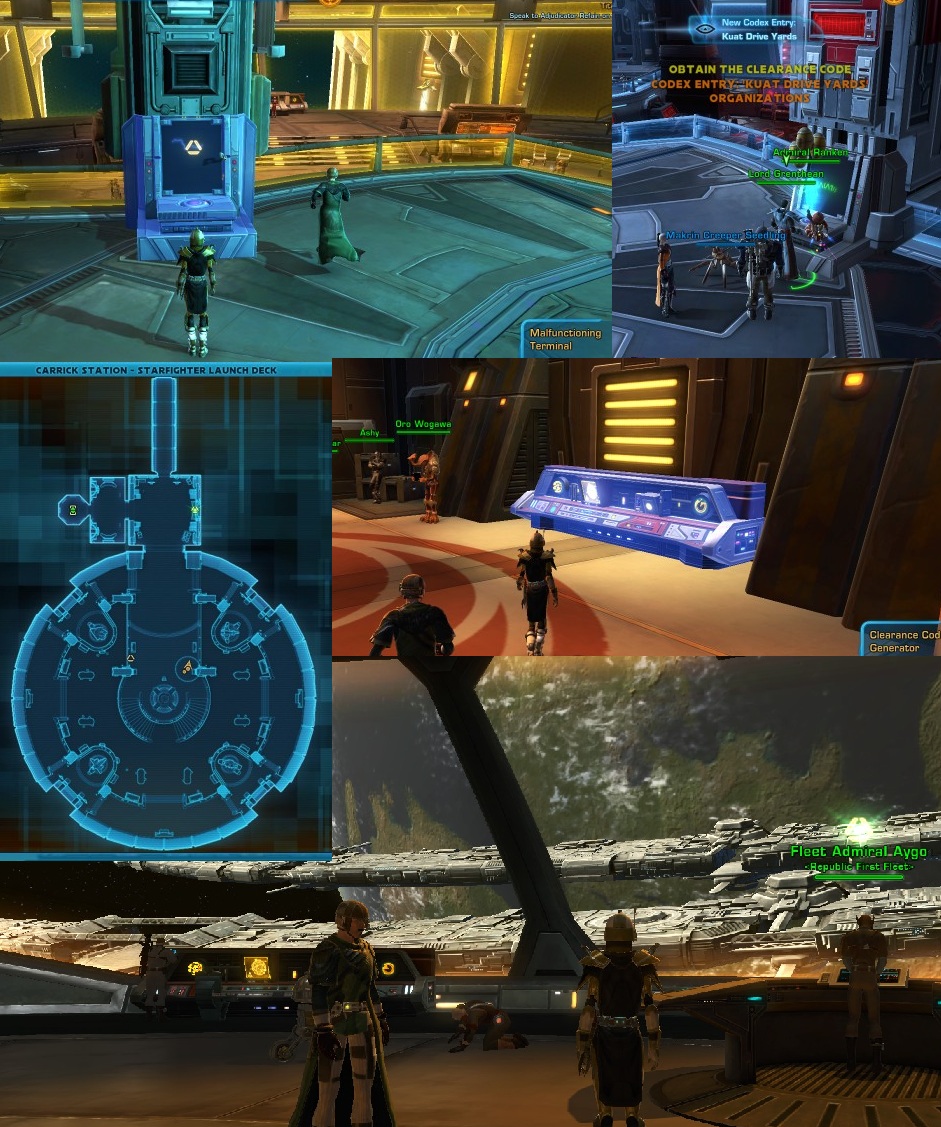
- Starfighter Launch Deck
-

- Kuat Drive Yards Prologue Quest
Scenarios
There is a total number of 5 random scenarios that players can experience inside this flashpoint. These scenarios are completely solo-able and reward a decent amount of legacy points. You’ll come across rare mobs inside the flashpoint. These mobs usually drop Green and Blue reputation trophies for Republic First Fleet and Imperial Forward Command reputations. Rare mobs also drop KDY Construction Kit, which are used as resource for new reputations Republic First Fleet and Imperial Forward Command.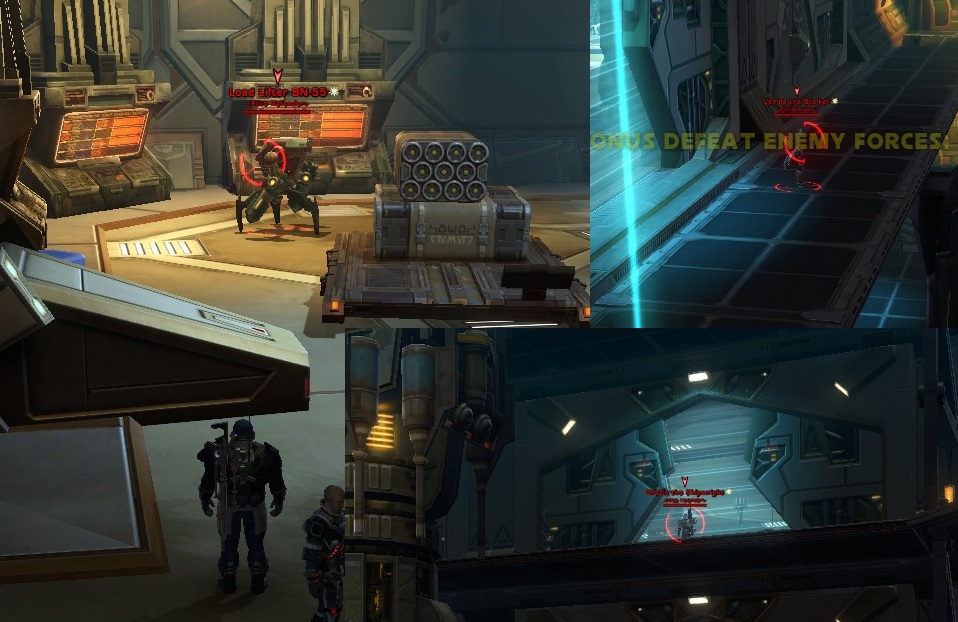
Load Lifter / Drezing the Shipwright / Lenna the Stalker
- Load Lifter BN-55 (most commonly found): Green Reputation Trophy
- Drezin the Shipwright : KDY Construction Kit, Blue Reputation Trophy
- Len’na the Stalker: KDY Construction Kit, Blue Reputation Trophy
- AX-871: KDY Construction Kit, Blue Reputation Trophy …
There are also two types of bonus quests. The first type is specifically tide to a scenario you are currently completing, while the “Sabouteur” (Destroy 20 Enemy Supply Drops) spreads over two scenarios.
Hangar Bay Scenario
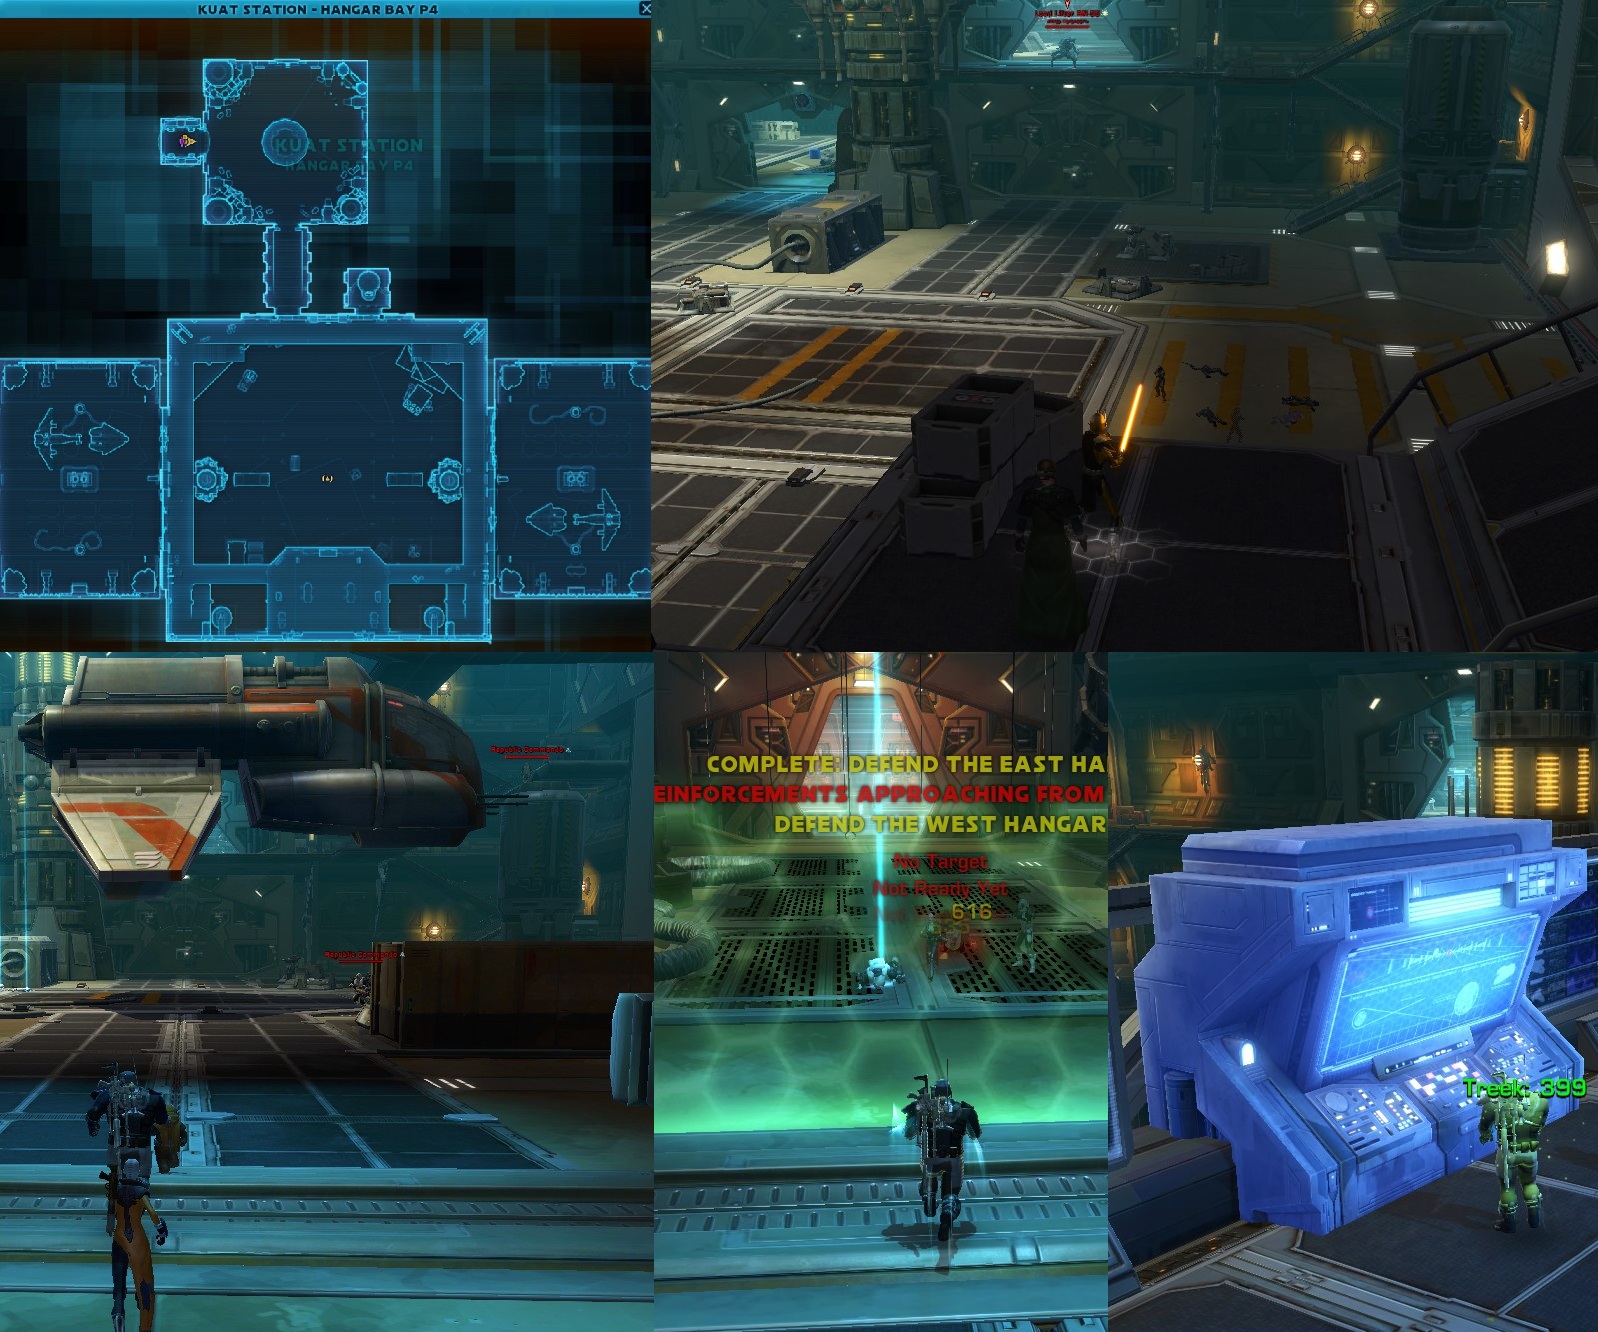
Hangar Bay Scenario
This area is great for scouting the rare mobs. When you enter the Hangar you can quickly check out all the mobs inside.
Cannon Emplacement Scenario
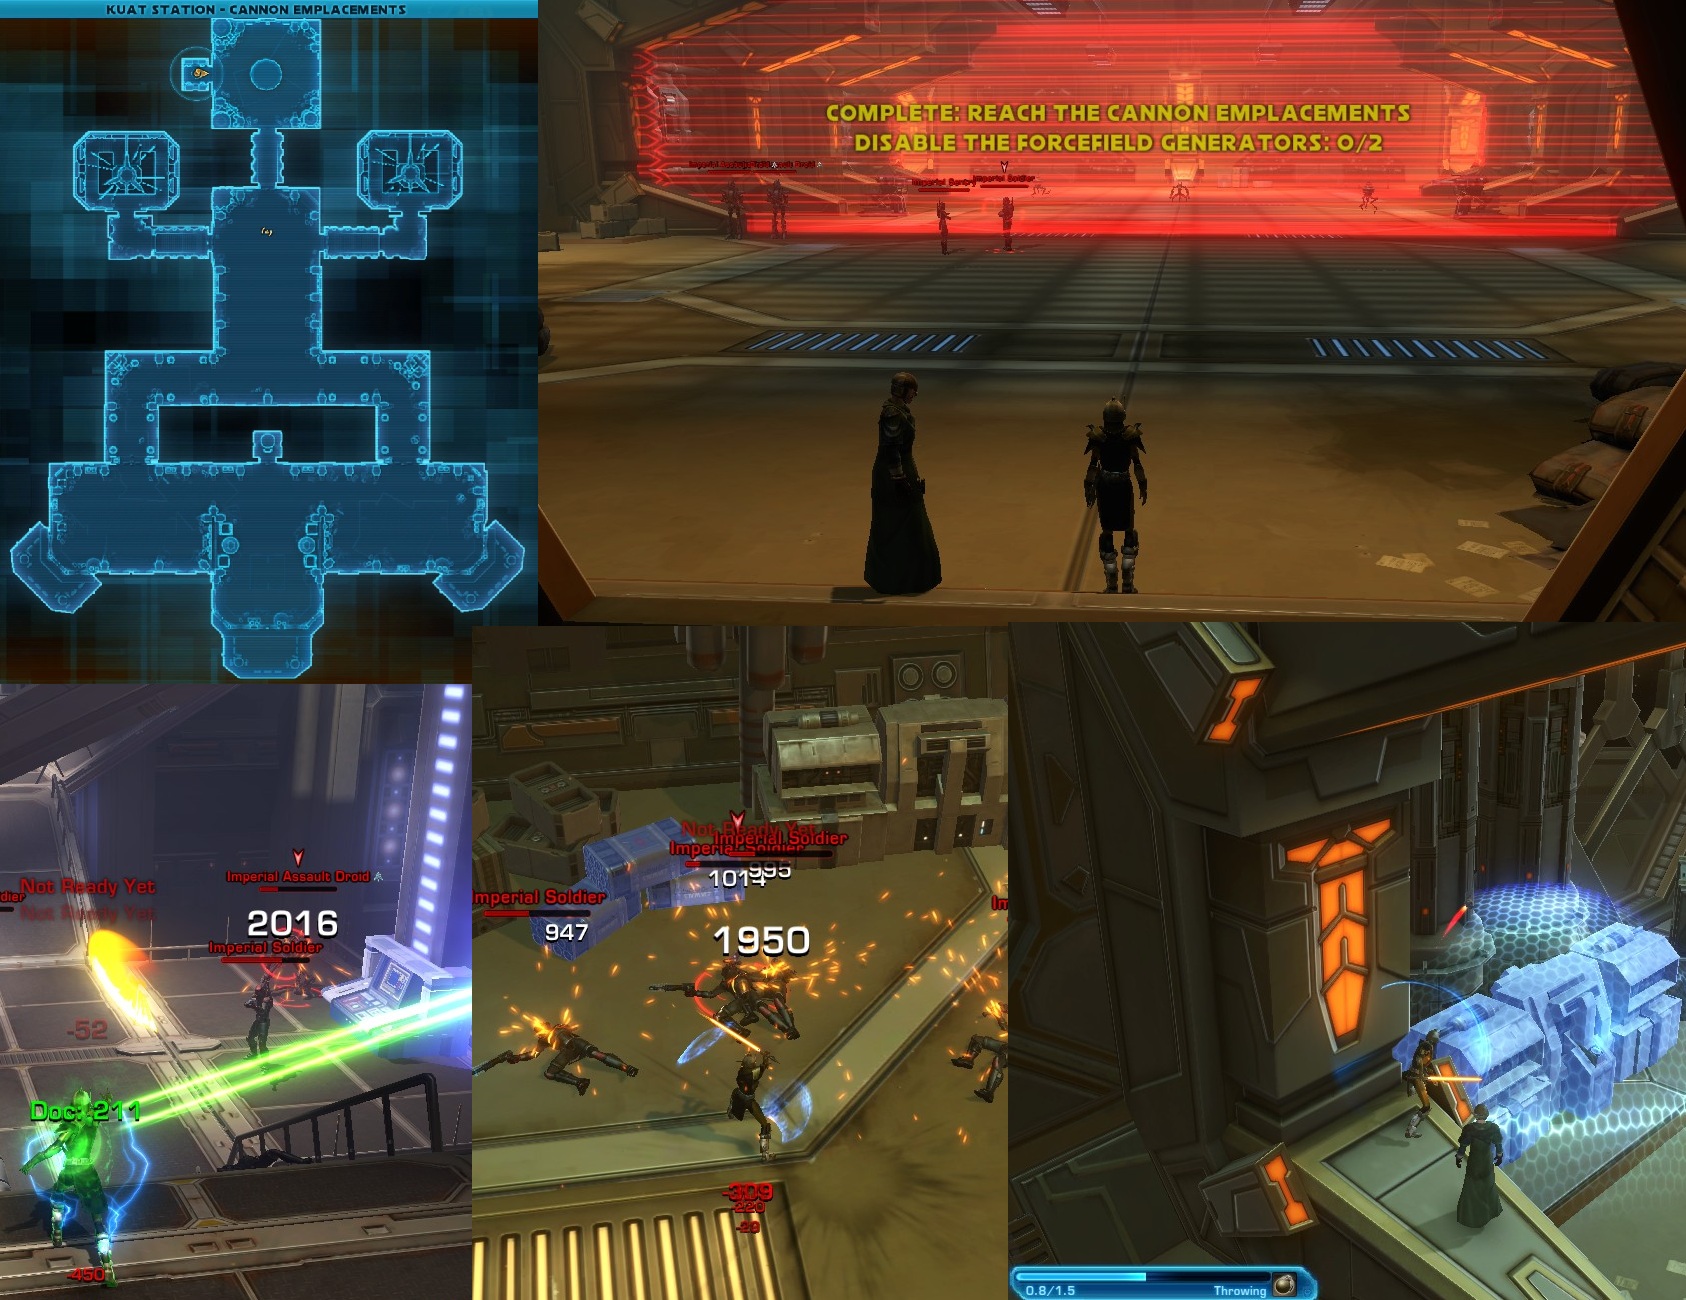
Cannon Emplacement Scenario
Central Armory Scenario
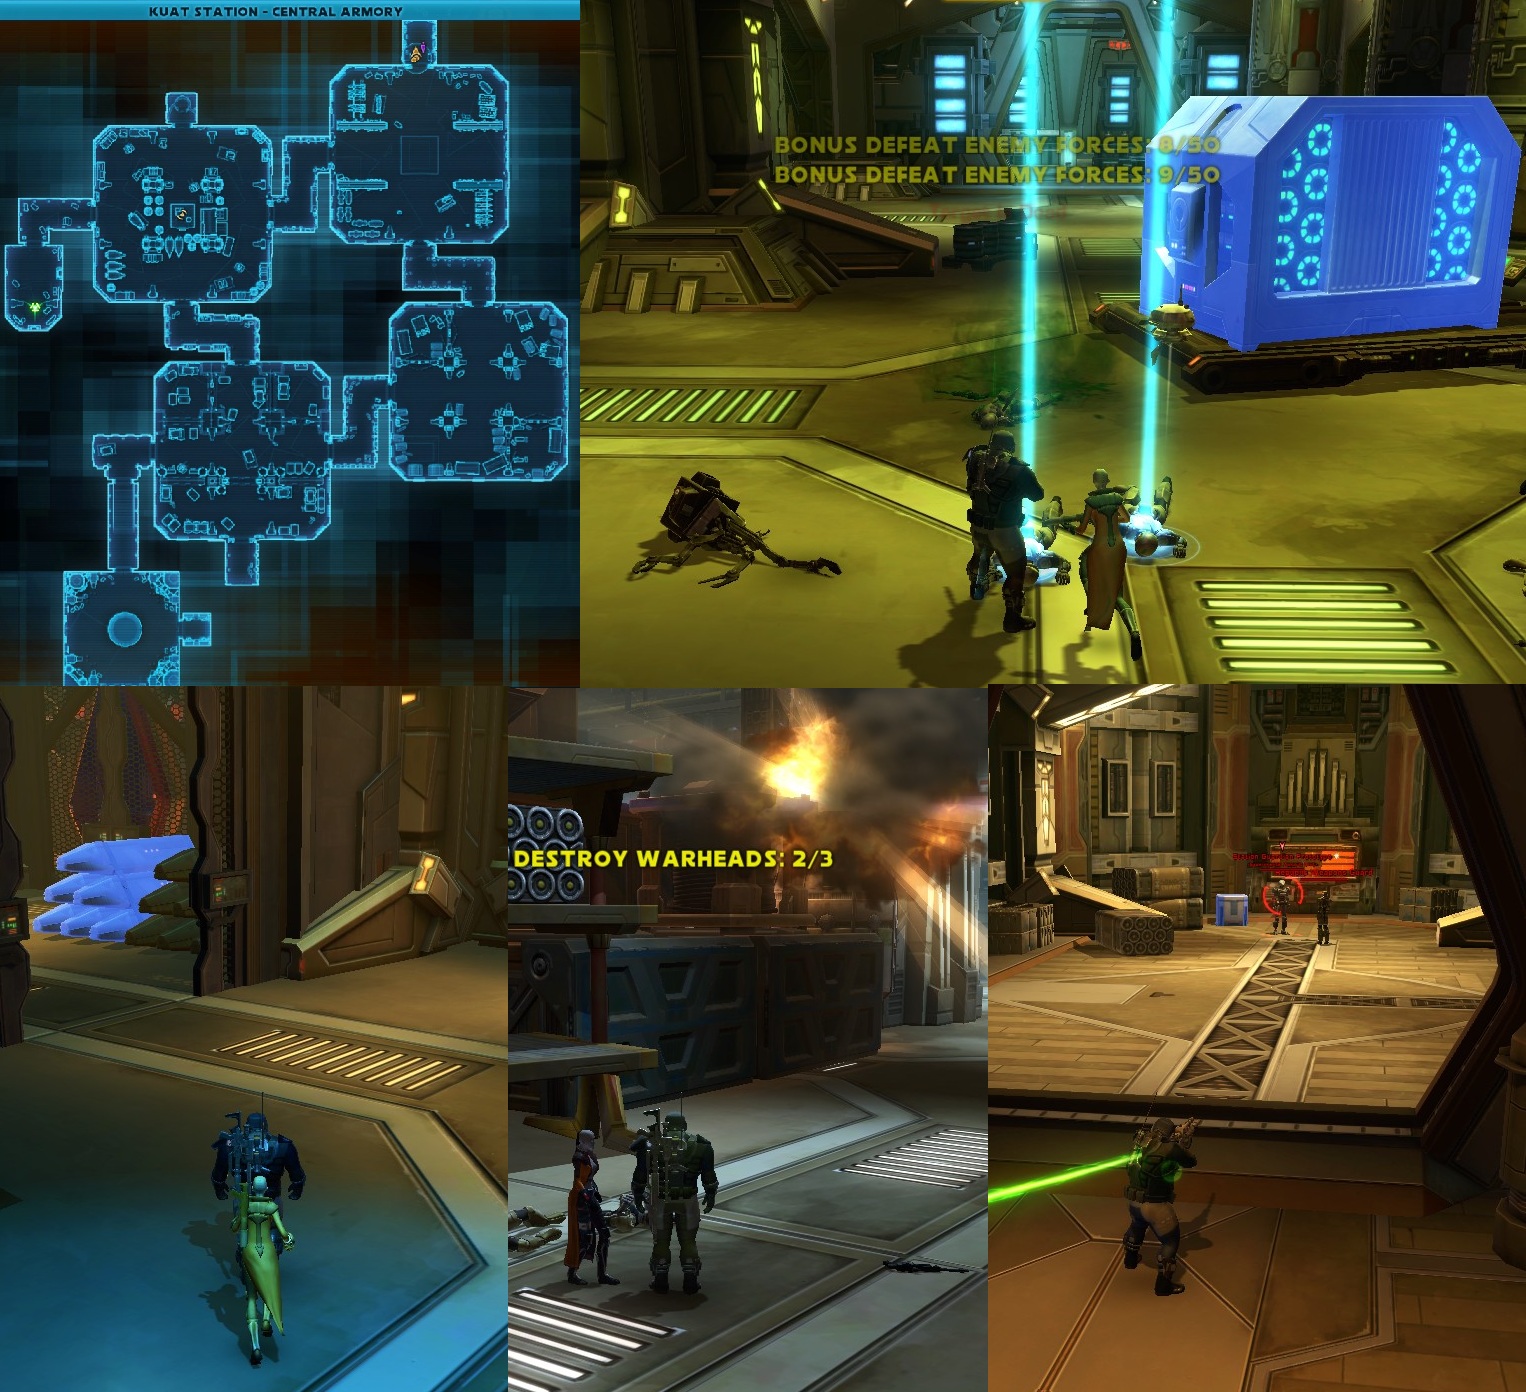
Central Armory Scenario
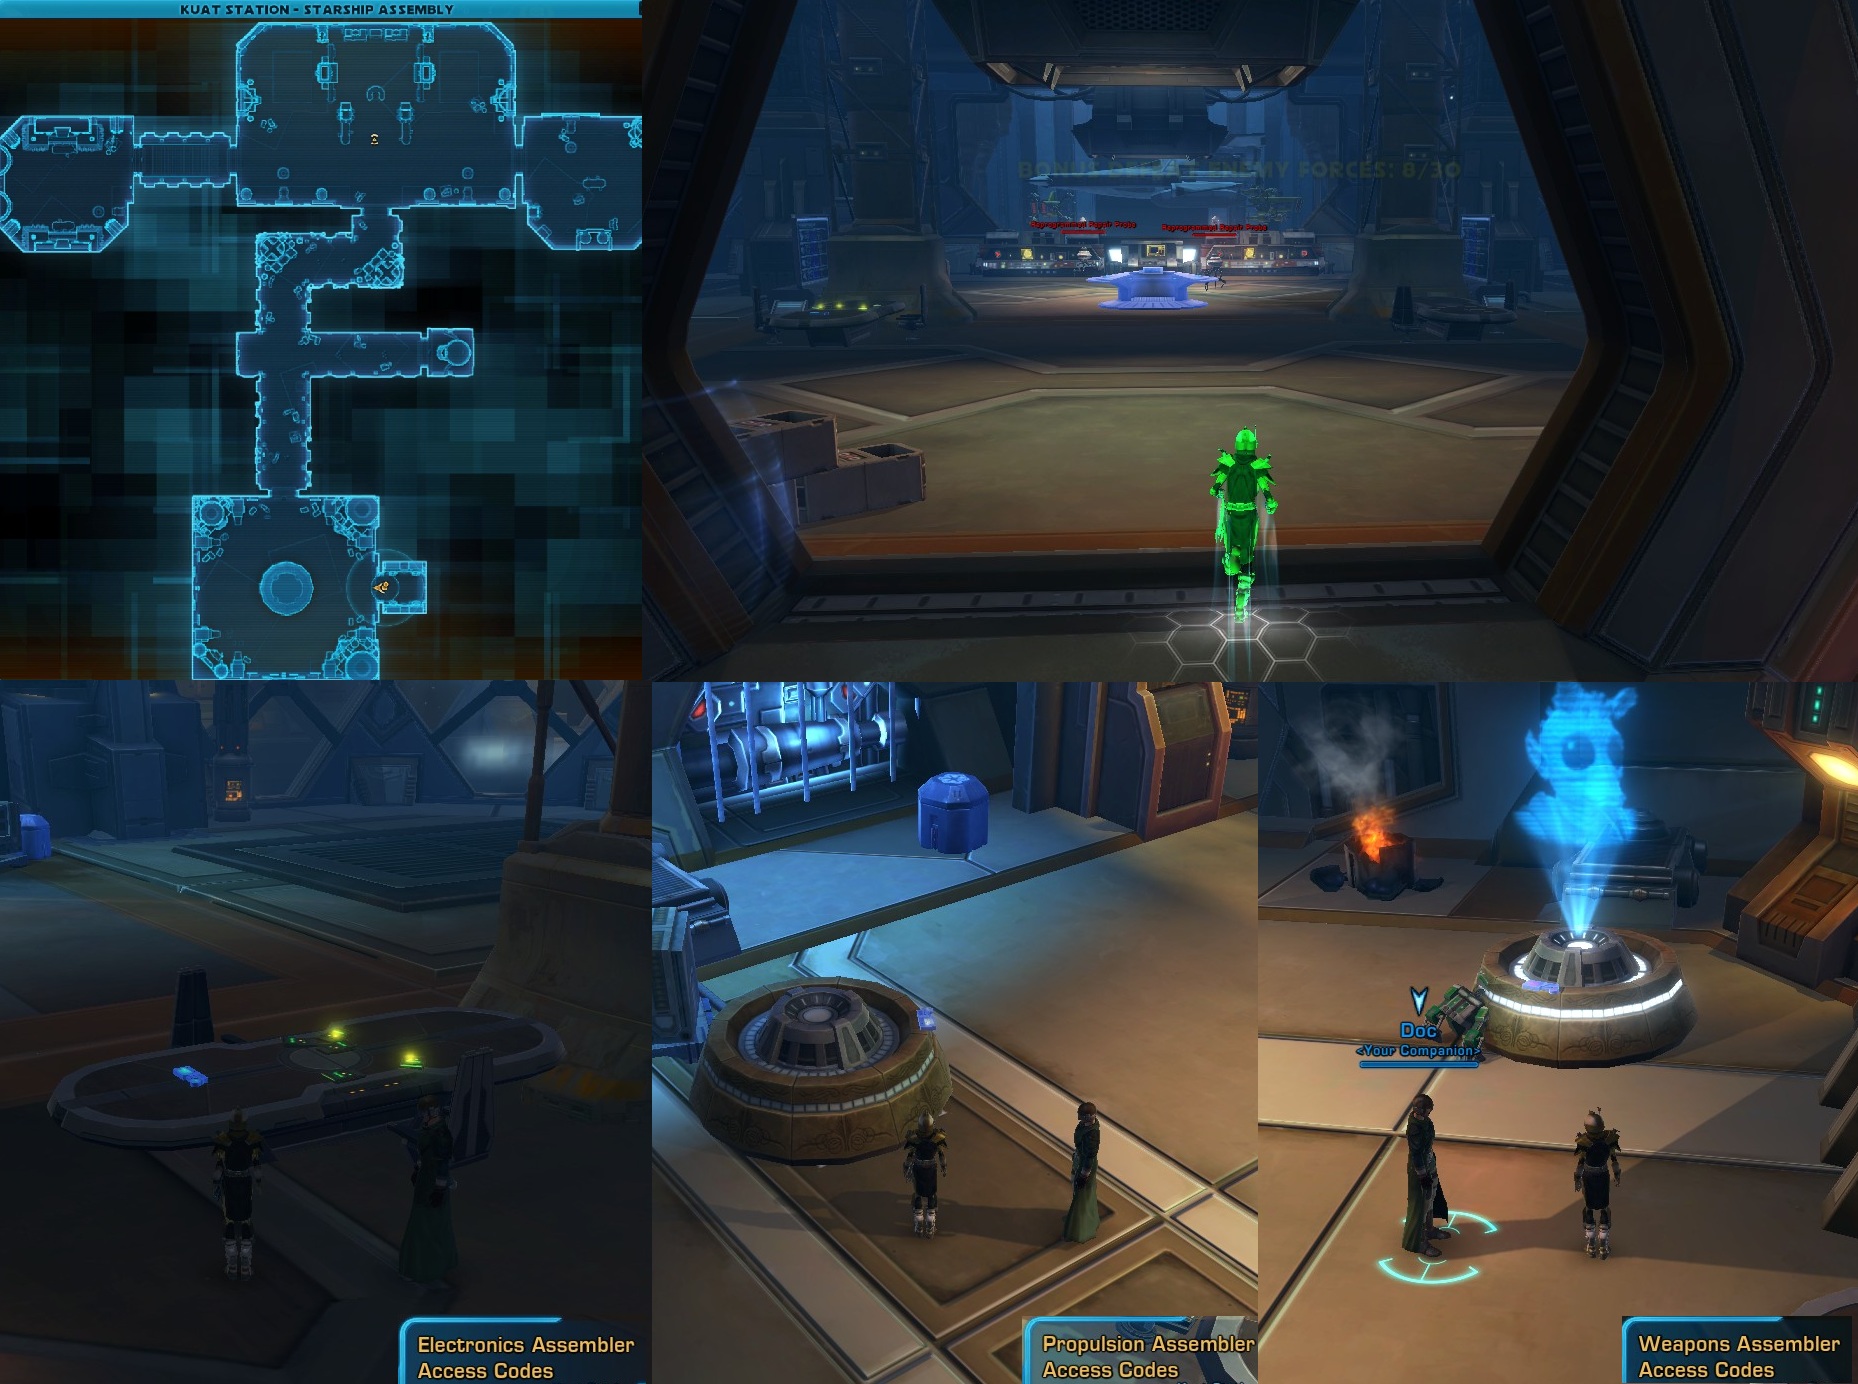
Starship Assembly Scenario
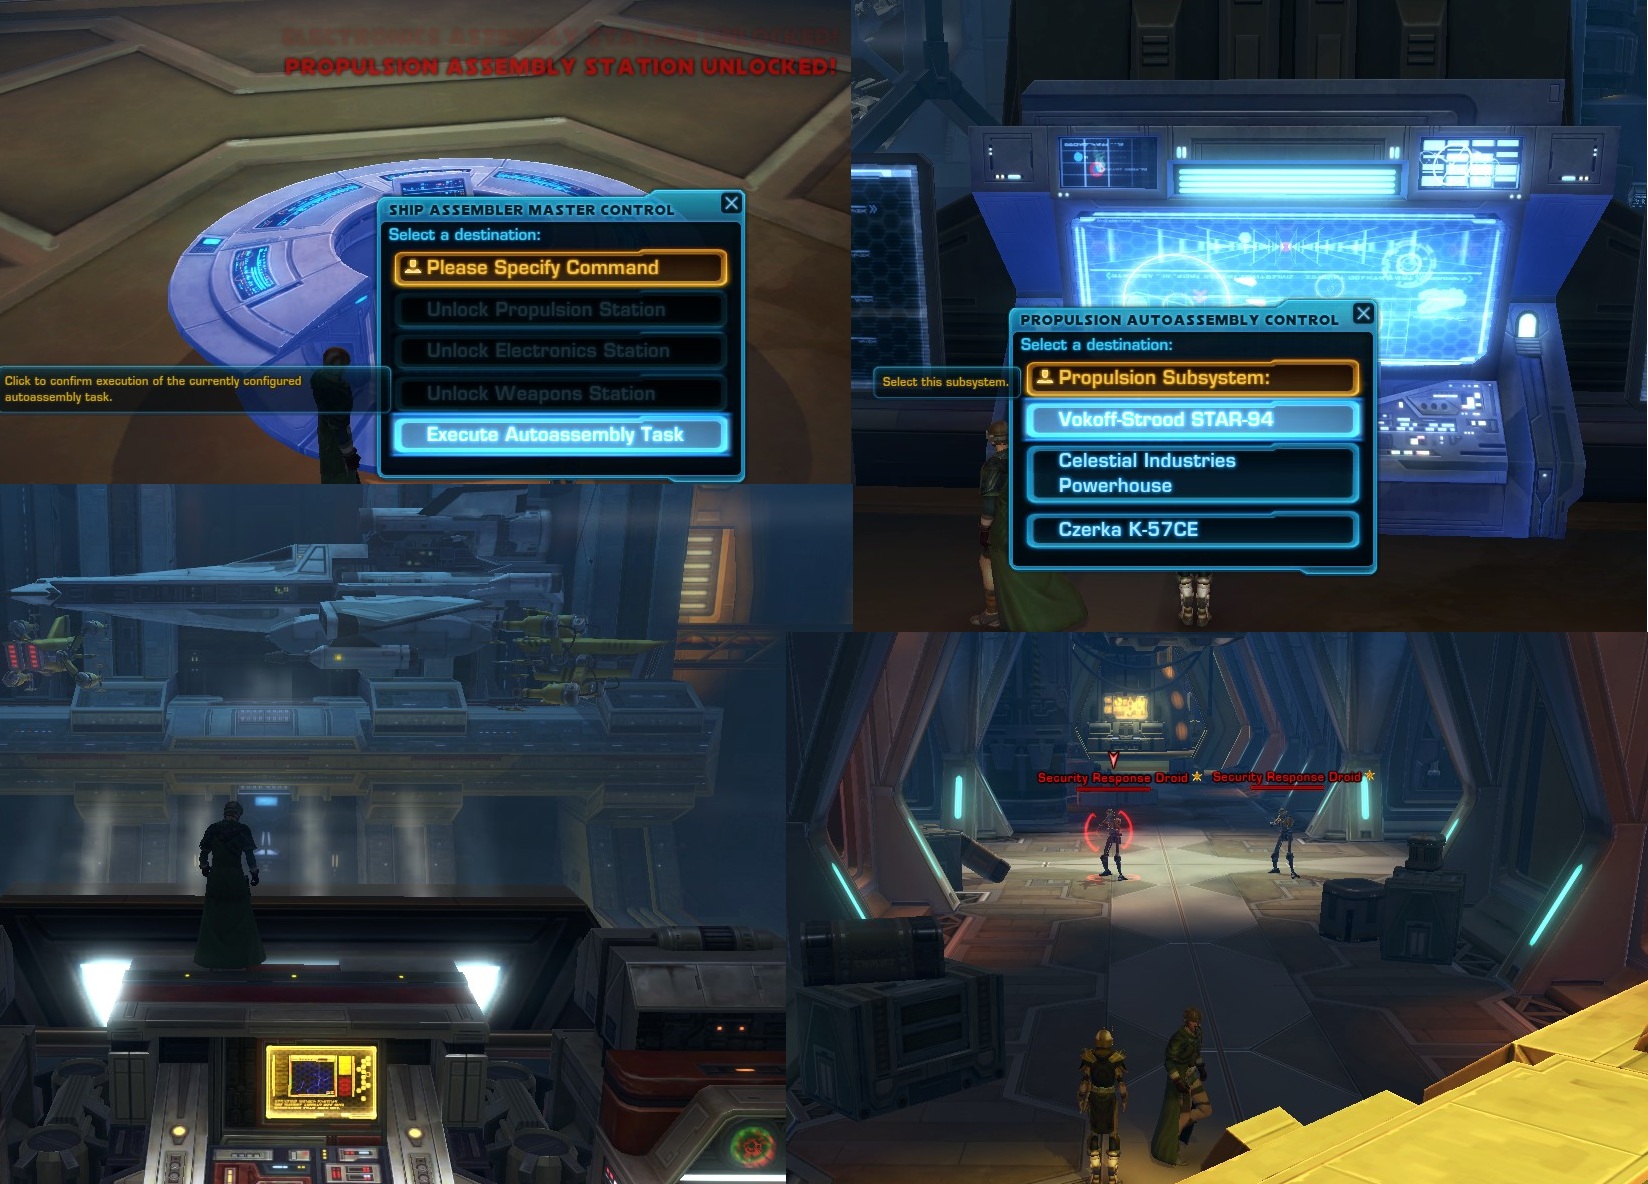
Starship Assembly scenario has very interesting story. In order to complete it, you need to grab three Access Codes. Electronics, Propulsion and Weapons Assembler Access Codes can be found in the following rooms: in the Central room on the table, and in two rooms at the sides of the Central room. At the end of the scenario, you should assemble the Ship Prototype and watch it burn…-

- Starship Assembly Scenario
-

- Starship Assembly Scenario Objectives
Holding Cells Scenario

Holding Cells Scenario
Third Map Bosses
There are five Bosses you can encounter at the end of Kuat Drive Yards Flashpoint. They are extremely hard to be defeated solo, but this job is not impossible. They can be easily defeated with a 2-man group. After defeating them, you will be rewarded with two blue reputation trophies. The first one comes as a drop from a boss, while the other one is a reward for completing the flashpoint.Major Benes or Lieutenant Krupp
Map: Kuat Station – Hangar ApproachWhile defeating Major Benes or Lieutenant Krupp you should be aware of some of abilities:
- Handful of Grenades – When the boss debuffs you with this ability, you should remove it as soon as possible or it’ll explode and take 20% of your HP. Luckily for you, this debuff also gives you a buff Slight Panic that boosts you with 100% speed. Run towards Degaussing Array console in the corner of the room. Using this small console, you’ll activate a blue platform near it. Keep standing on the platform, until the bomb is removed. In that moment the platform will turn red and explode in a few seconds. Just move away from the platform.
- Call Reinforcements – Each spell summons wave of three 9000hp adds. Defeat them quickly in order not to become overwhelm by their number and damage.
- Mortar Volley – Master Khoris drops a heavy volley on player’s current location. Move away from it, to avoid damage.
-

- Hangar Apporach
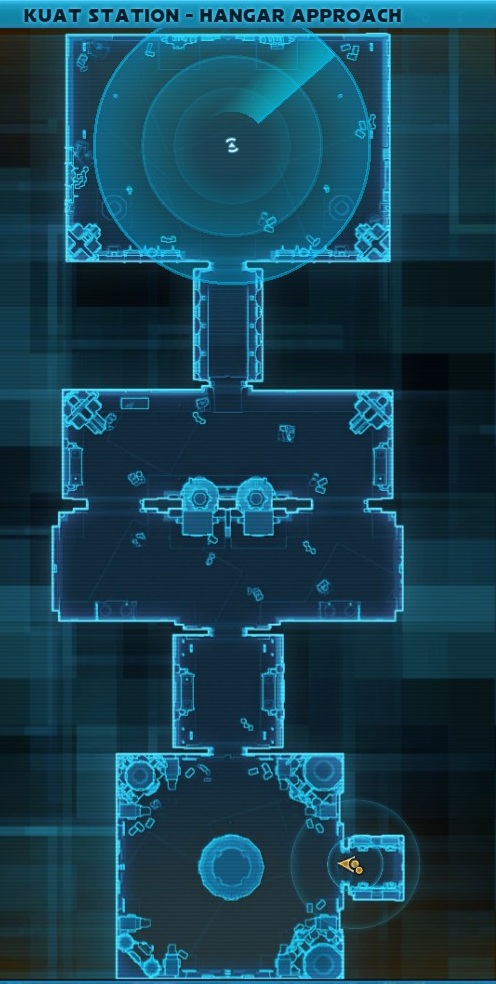
-

- Major Benes / Lieutenant Krupp

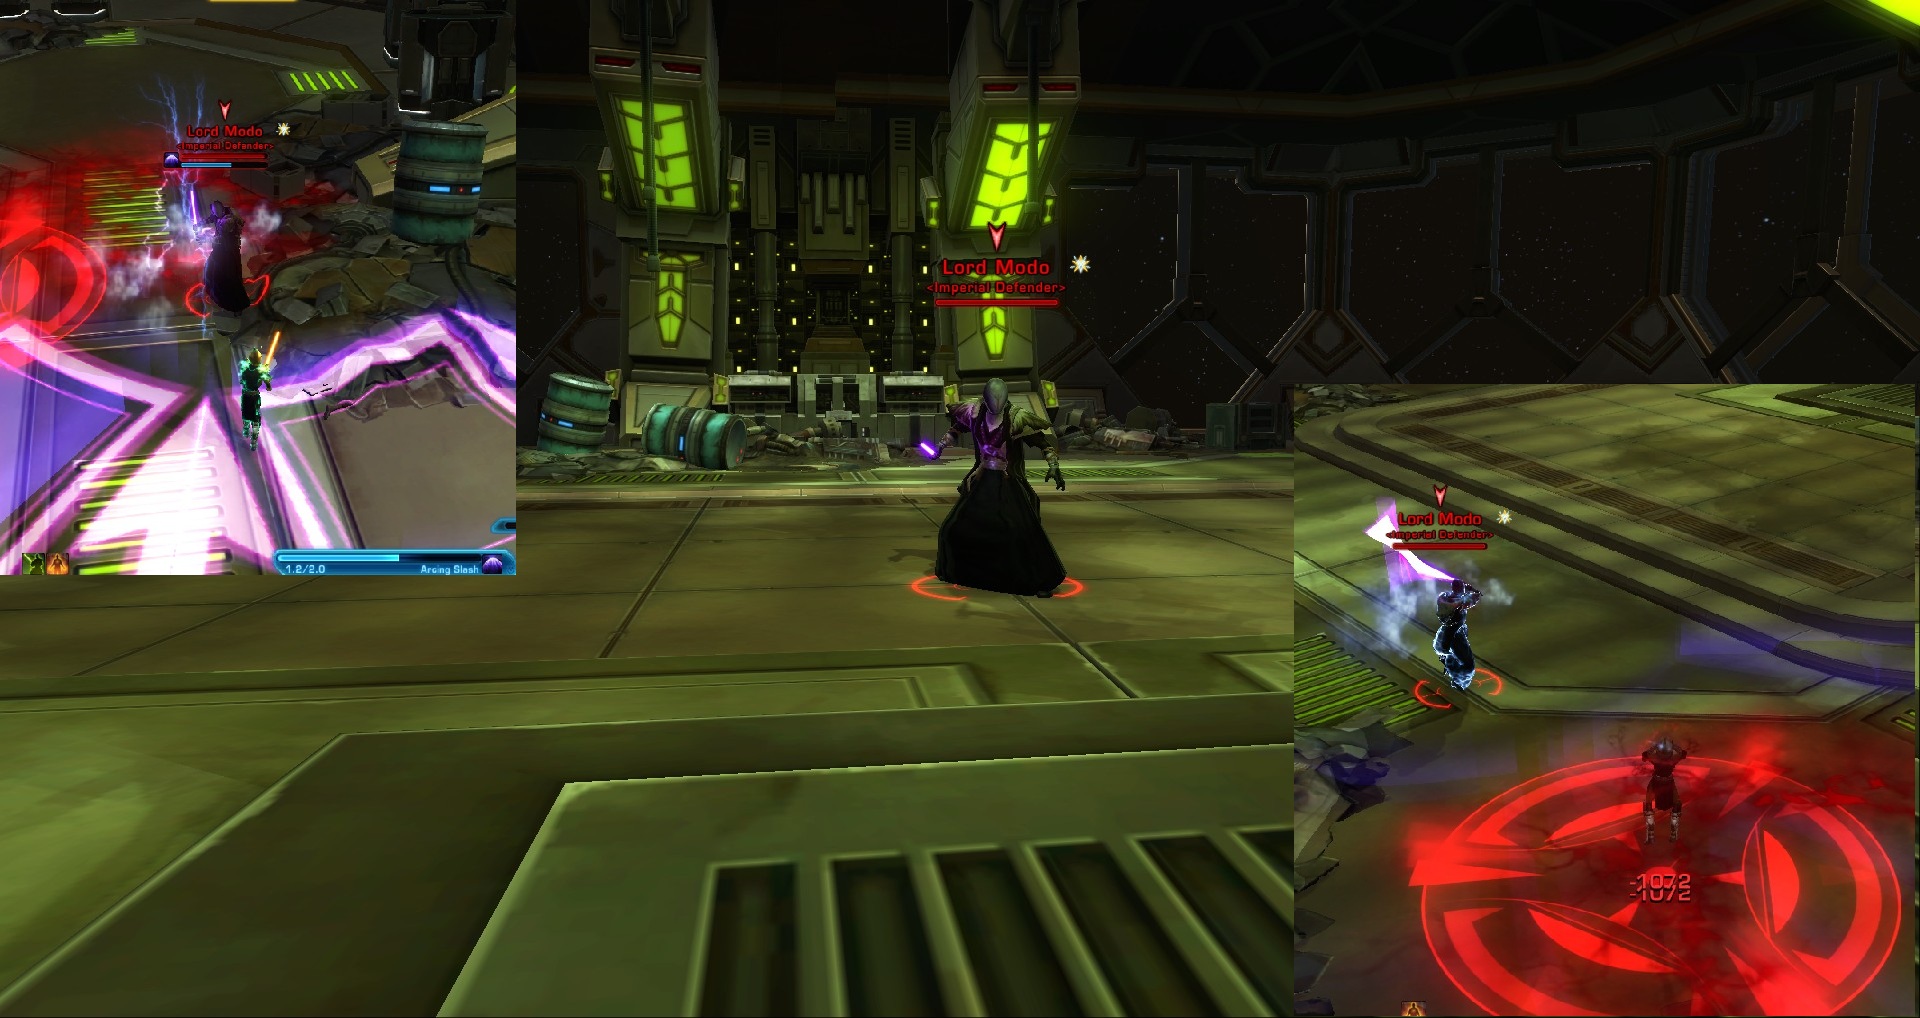
Master Khoris or Lord Modo
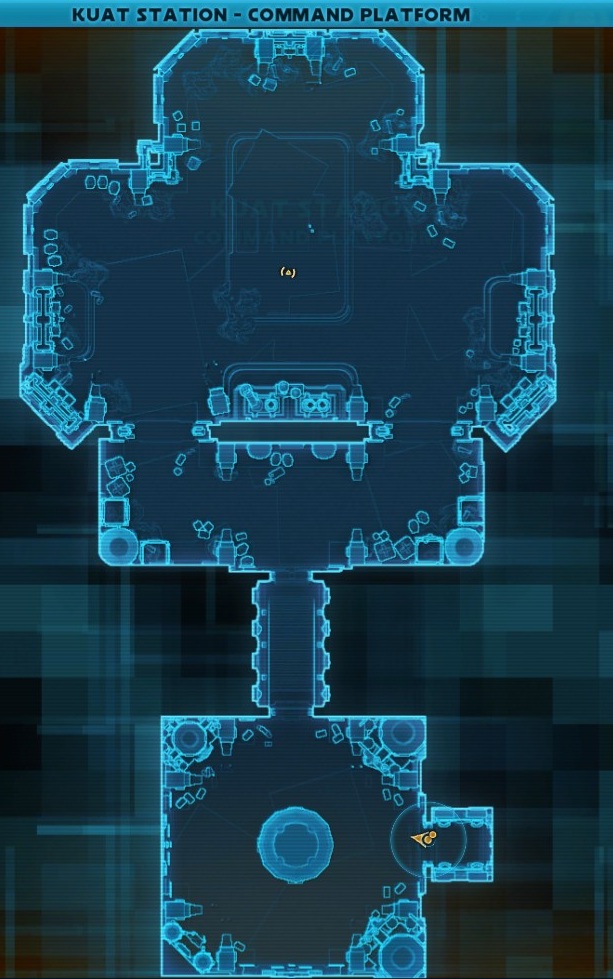
Map: Kuat Station – Command PlatformYou have to move constantly while fighting this boss. You should be aware of the following abilities:
- Force Crush – AOE red circles, the boss drops around players. Avoid them at any cost as they do massive damage and stun as well.
- Forced Shockwave – This skill will push you back, far away form the boss
- Arcing Slash – strong, frontal cone damage spell. Avoid it when you can.
-

- Command Platform
-

- Master Khoris / Lord Modo
Station Guardian One
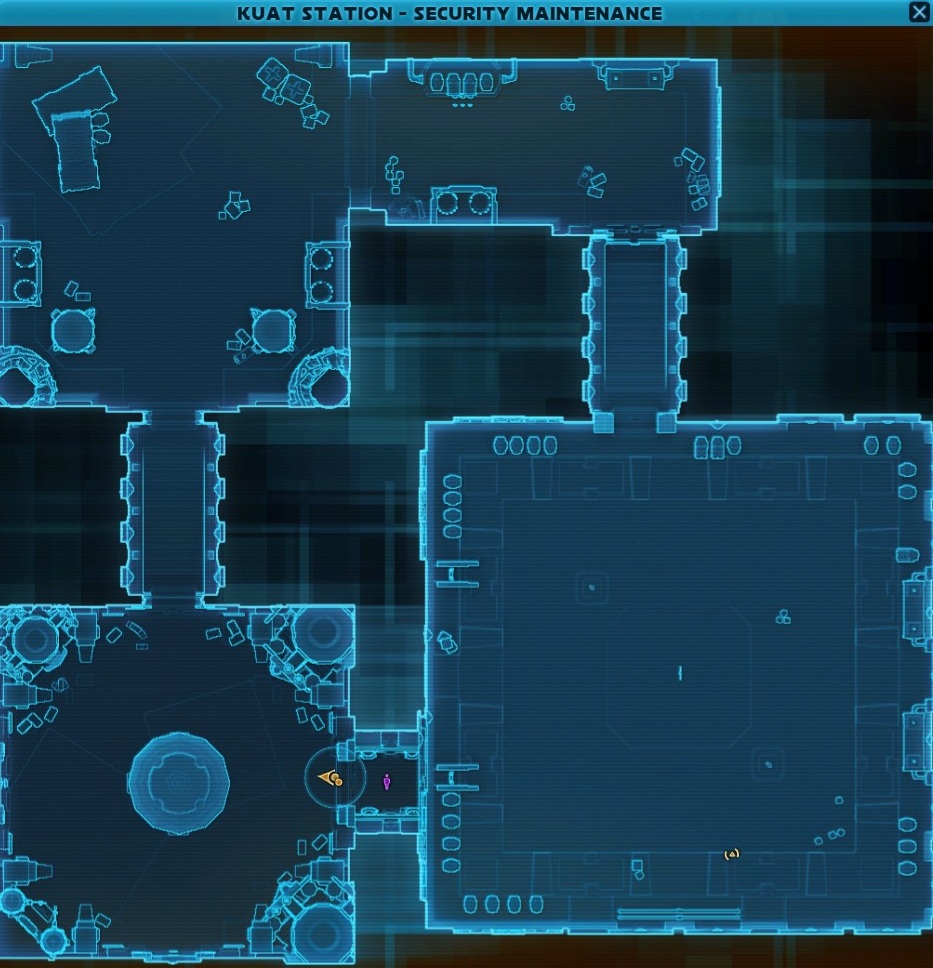
Map: Kuat Station – Security MaintenanceOne of the bosses that requires a lot of work. The following spells should be avoided or interrupted:
- Activate Support– spawns Support Droids around him. These droids do Empower spell, which boosts Guardian One Charge Level. He becomes fully charged when he reaches 100 Charge Level, and becomes immune to all damage for a brief time, while casting devastating Full Charge Volley spell. All party members should focus on defeating droids.
- Activate Suppression spell spawns Suppression Droids that attacks players and spawns suppression field under their feet. This field will slow down and damage players.
- Hall of Bolts – single target damage spell, on the player with highest aggro.
- Full Charge Volley – extremely dangerous when Guardian One is Full Charged. Avoid it when you can.
-

- Security Maintenance
-

- Station Guardian One

Codex
- Kuat Drive Yards / Organisations – Inside Starfighter Launch Deck, upon accepting the Kuat Drive Yards prologue quest.
- Admiral Zasha Ranken / Persons of Note – Empire only. Obtainable upon talking with Admiral Zasha Ranken in Kuat – Imperial Flagship Bridge while you have quest “The Ranken Initiative”.
- Fleet Admiral Bey’wan Aygo / Persons of Note – Republic only. Obtainable upon talking with Fleet Admiral Aygo in Kuat – Imperial Flagship Bridge while you have quest “The Secret War”.
Achievements
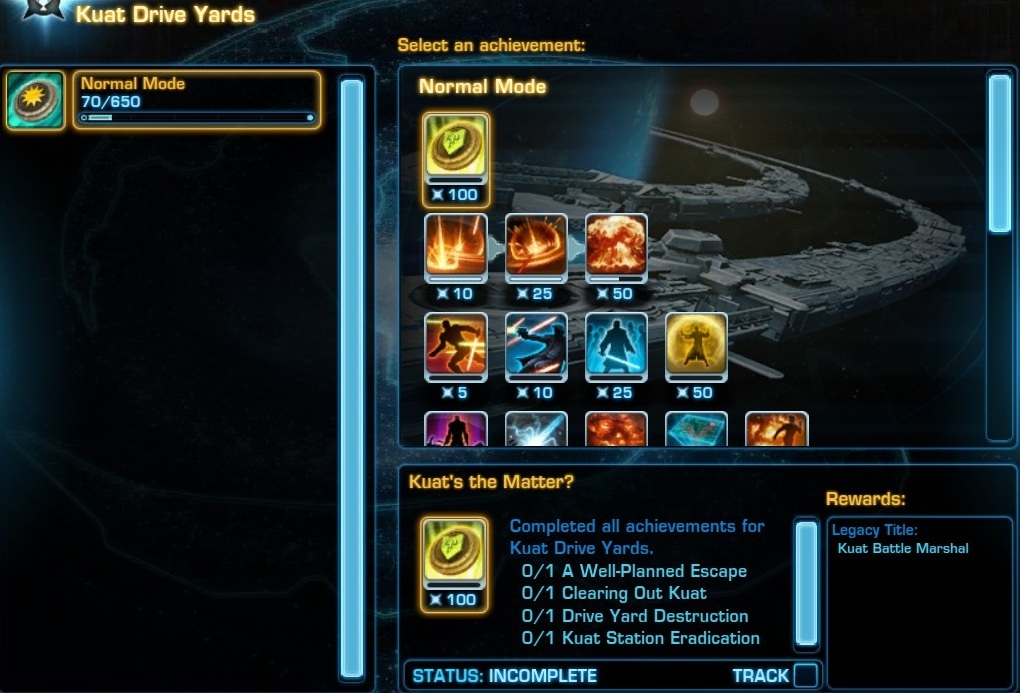 650 achievements points in total and Legacy Tittle: “Kuat Battle Marshal”
- 650 Achievement points in total.
- 100 for completing 4 specific achievements.
- 85 for 2 500 non-player opponents defeated while aboard the Kuat Flashpoint.
- 90 for single-handedly rescued prisoners during the Kuat Holding Cells Scenario.
- 25 for completing all scenarios once.
- 100 for completing each scenario 10 times.
- 25 for defeating each Kuat Drive Yards main boss once.
- 50 for defeating each Kuat Drive Yards main boss 5 times
- 175 for defeating each Kuat Drive yards main boss 10 times

Does the player’s companion get bolstered too or is it worthless if a low level?
Thing is, at level range 15-54 you can’t join Kuat Drive Yards manually through the entrance in Starfighter Launch Deck. If you are level 55 however, your comps do not need the best gear (I’ve just figured out that my healing comp has level 37 gear lol) in order to help you out through the first two scenarios.
I was more wondering if joined it and then had someone leave, get booted, etc. I tend to trust my companions far more than I trust most other players…
They are unreliable as they do not move out of hurtful spells. They are not completely worthless, but another player would do you less harm I guess. But back on your question, it seems that comps gets a little boosted.
There is a way to build a ship in the Shipwright scenario that does not blow up. I haven’t figured it out exactly yet, but it is possible
Yes there is a way to make a ship without it blowing up, on the table in the center room with the Access codes are 5 datapads, mouse over them and they will tell you how to build the ship. Sometimes they will say “use this part” other times it will say “this part is unstable or has been recalled” you just need to pay attention to it. Also as far as I can tell there are only 3 “correct” configurations i.e. if it wants the Infiltrator electronics it will always be the same 2 other parts